Shop Categories Stone Cladding Exterior Stone Installation - Exterior Stone
Installation - Exterior Stone
Concrete, Cement Based, Stone Cladding and Stacked Stone for Externall walls - Fitting Instructions
INSTALLATION VIDEO - Click Here to watch the video
1. Exterior Stone Cladding - Fitting Instruction
- Before starting work, measure the room(s) carefully, calculate the area of the target surfaces and buy 10% more material than is theoretically required, with a sufficient supply of the primer, adhesive, pointing compound and impregnant - surface sealant.
- If you need to install corners, purchase 5% more material than you have calculated. If you buy all the material you need at once, you can be sure the tile and joint color will be consistent.
- The variation of colors within a single box is intentional as it adds a natural look to the façade. Take tiles from a few boxes one by one to distribute tile tints evenly.
- Ambient temperature during, and within 48 hours after, the application should stay within the +5oC to +25oC range.
- Some information may not apply to certain product types. Please read the instruction located on the product packaging before proceeding with work.
Wall - Surface Preparation
- All the surfaces should be correctly conditioned. They should be strong enough, uniformly textured, even, dry and free from any loose material, residues of paints, antiadhesive agents and grease.
- It is recommended to prime the target surface to improve bonding.
BONDING
- Start lying the tiles from corners or most prominent places, avoiding forced joints on surfaces that you want to look perfect.
- The tile surface to be bonded has to be cleaned of efflorescence created by the manufacturing process with a spatula, wire brush, scrubbing brush, or similar tool.
- It is best to start from the bottom, resting the first row of tiles on the surface. If there is no even and horizontal support for tiles, mount a reference leveling screed on the wall using a mason’s level and a rule on a height not exceeding the height of a single row of tiles above the floor or ground.
- It is best to offset one row of tiles vs. the rows beneath and above (to avoid aligning the tiles/joints vertically). Please make sure each layer offset is approx 30% or 60% of the single tile lenght.
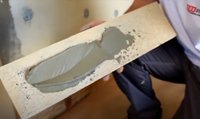
- Apply the adhesive by following the instruction provided on the adhesive used.
- You can cut tiles with a diamond disk or a stone-cutting disk.
SURFACE PROOFING
- Once done, impregnate the tiles with the Surface Sealant for easier tile cleaning in the future. It is best to impregnate the tiles after 14 days from the bonding.


